Seeing Science: How to Hack Magic Eye Images
Turning a tough binocular phenomenon into an easy monocular one.

If you were a kid in the 90’s, you almost certainly saw images like the one below at some point. Magic Eye images (also known as autostereograms) promised a stunning 3D experience from what looked like a random 2D pattern - all you had to do was…well, this is where things got a little tough. While some people could see these without too much effort (or at least, so they claimed), many others couldn’t see a thing! What’s worse, the advice offered to those that were struggling was both confusing and at times contradictory:
“Relax your eyes.”
“Cross your eyes a little, but don’t blur them.”
“Try to look through the image instead of at the image.”
Vision science doesn’t often get a bonafide cultural moment, but it seems to help when there is some sort of visual phenomenon that different people experience completely differently. This kind of disagreement about visual experience divided us into Team White & Gold and Team Black & Blue when the #thedress went viral, and Magic Eye images similarly divided the world into Those Who Could See It and Everybody Else. Unlike #thedress, however, this divide incorporated a healthy dose of FOMO - what was the cool thing people were seeing if they could get Magic Eye pictures to work? Staring at these in the hope that something would click and you’d become one of Those Who Could See It was a common enough experience for Seinfeld to write a Magic Eye gag into an episode.
The good news is that it turns out there’s a simple way to see the hidden 3D object in a Magic Eye picture without staring at it for hours. All you need is a digital version of the image you want to look and presentation software like PowerPoint or Keynote. To see how this works, check out my video below for a quick demo.
If you’ve never been able to see one of these before, congratulations! You just made it into the club.
To understand why my little PowerPoint hack works, we need to start with some basics of binocular depth perception. How do you see depth with your two eyes?
Binocular depth perception
An important feature of seeing the world binocularly is that your two eyes get slightly different views of the same scene. Since I started out by invoking the 90’s, I feel like I have to point out that Wayne’s World includes a random scene where Mike Myers provides a straightforward demonstration of this fact while gazing at Tia Carrere and alternating which eye he has open.

“Camera 1. Camera 2. Camera 1. Camera 2.”
The two images you have to work with, one from the left eye and the other from the right, will contain most of the same visual stuff, but they’ll differ with regard to where things are. Whatever you’re looking directly at will be in the same place in both eyes (right in the center of your visual field), but stuff that’s closer to you than that or further away will “jump” horizontally as you switch from one eye to the other. To be more specific, things that are closer to you than the object you’re looking at will end up off to the left in your left eye, and off to the right in your right eye. Things that are further away will do just the opposite: These will be off to the right in your left eye and off to the left in your right eye. How far “off” they are depends on how much closer or farther away they are.
The technical term for these differences in horizontal position between the left eye image and the right eye image of the same scene is binocular disparity, and because they’re systematic, your visual system can use them to make guesses about depth. The big idea is that since the direction (is the same object off to the left or right in each eye?) and the magnitude (how far off to the side is it in each eye?) of binocular disparity depends on how far away an object is, measuring the position of an object in each eye is enough to run the logic backwards:
If the same object is off to the left in the left eye and off to the right in the right eye, it’s closer to us than what we’re looking at.
If the opposite is true, it’s further away than what we’re looking at.
The more it’s shifted, the closer (or further) the object is.
The visual system’s ability to use these 3 rules to turn binocular disparity into depth also gives us a recipe for making 2D images that look 3D: If we give your left and right eye two images to see that have the right binocular disparities in them, your visual system should use those to give you a 3D experience.
Easier-to-see 3D pictures rely on binocular disparity.
It turns out to be pretty easy to do this. Stereoscopic images that relied on this principle have been around since the 19th century. Below, you can see an example of a Holmes stereoscope that contains a left eye image and a right eye image of the same scene that are delivered to the appropriate eyes by virtue of the lenses installed in the wooden frame nearest to you. The classic ViewMaster toy and modern VR viewers you can clip to your phone aren’t meaningfully different than these devices.
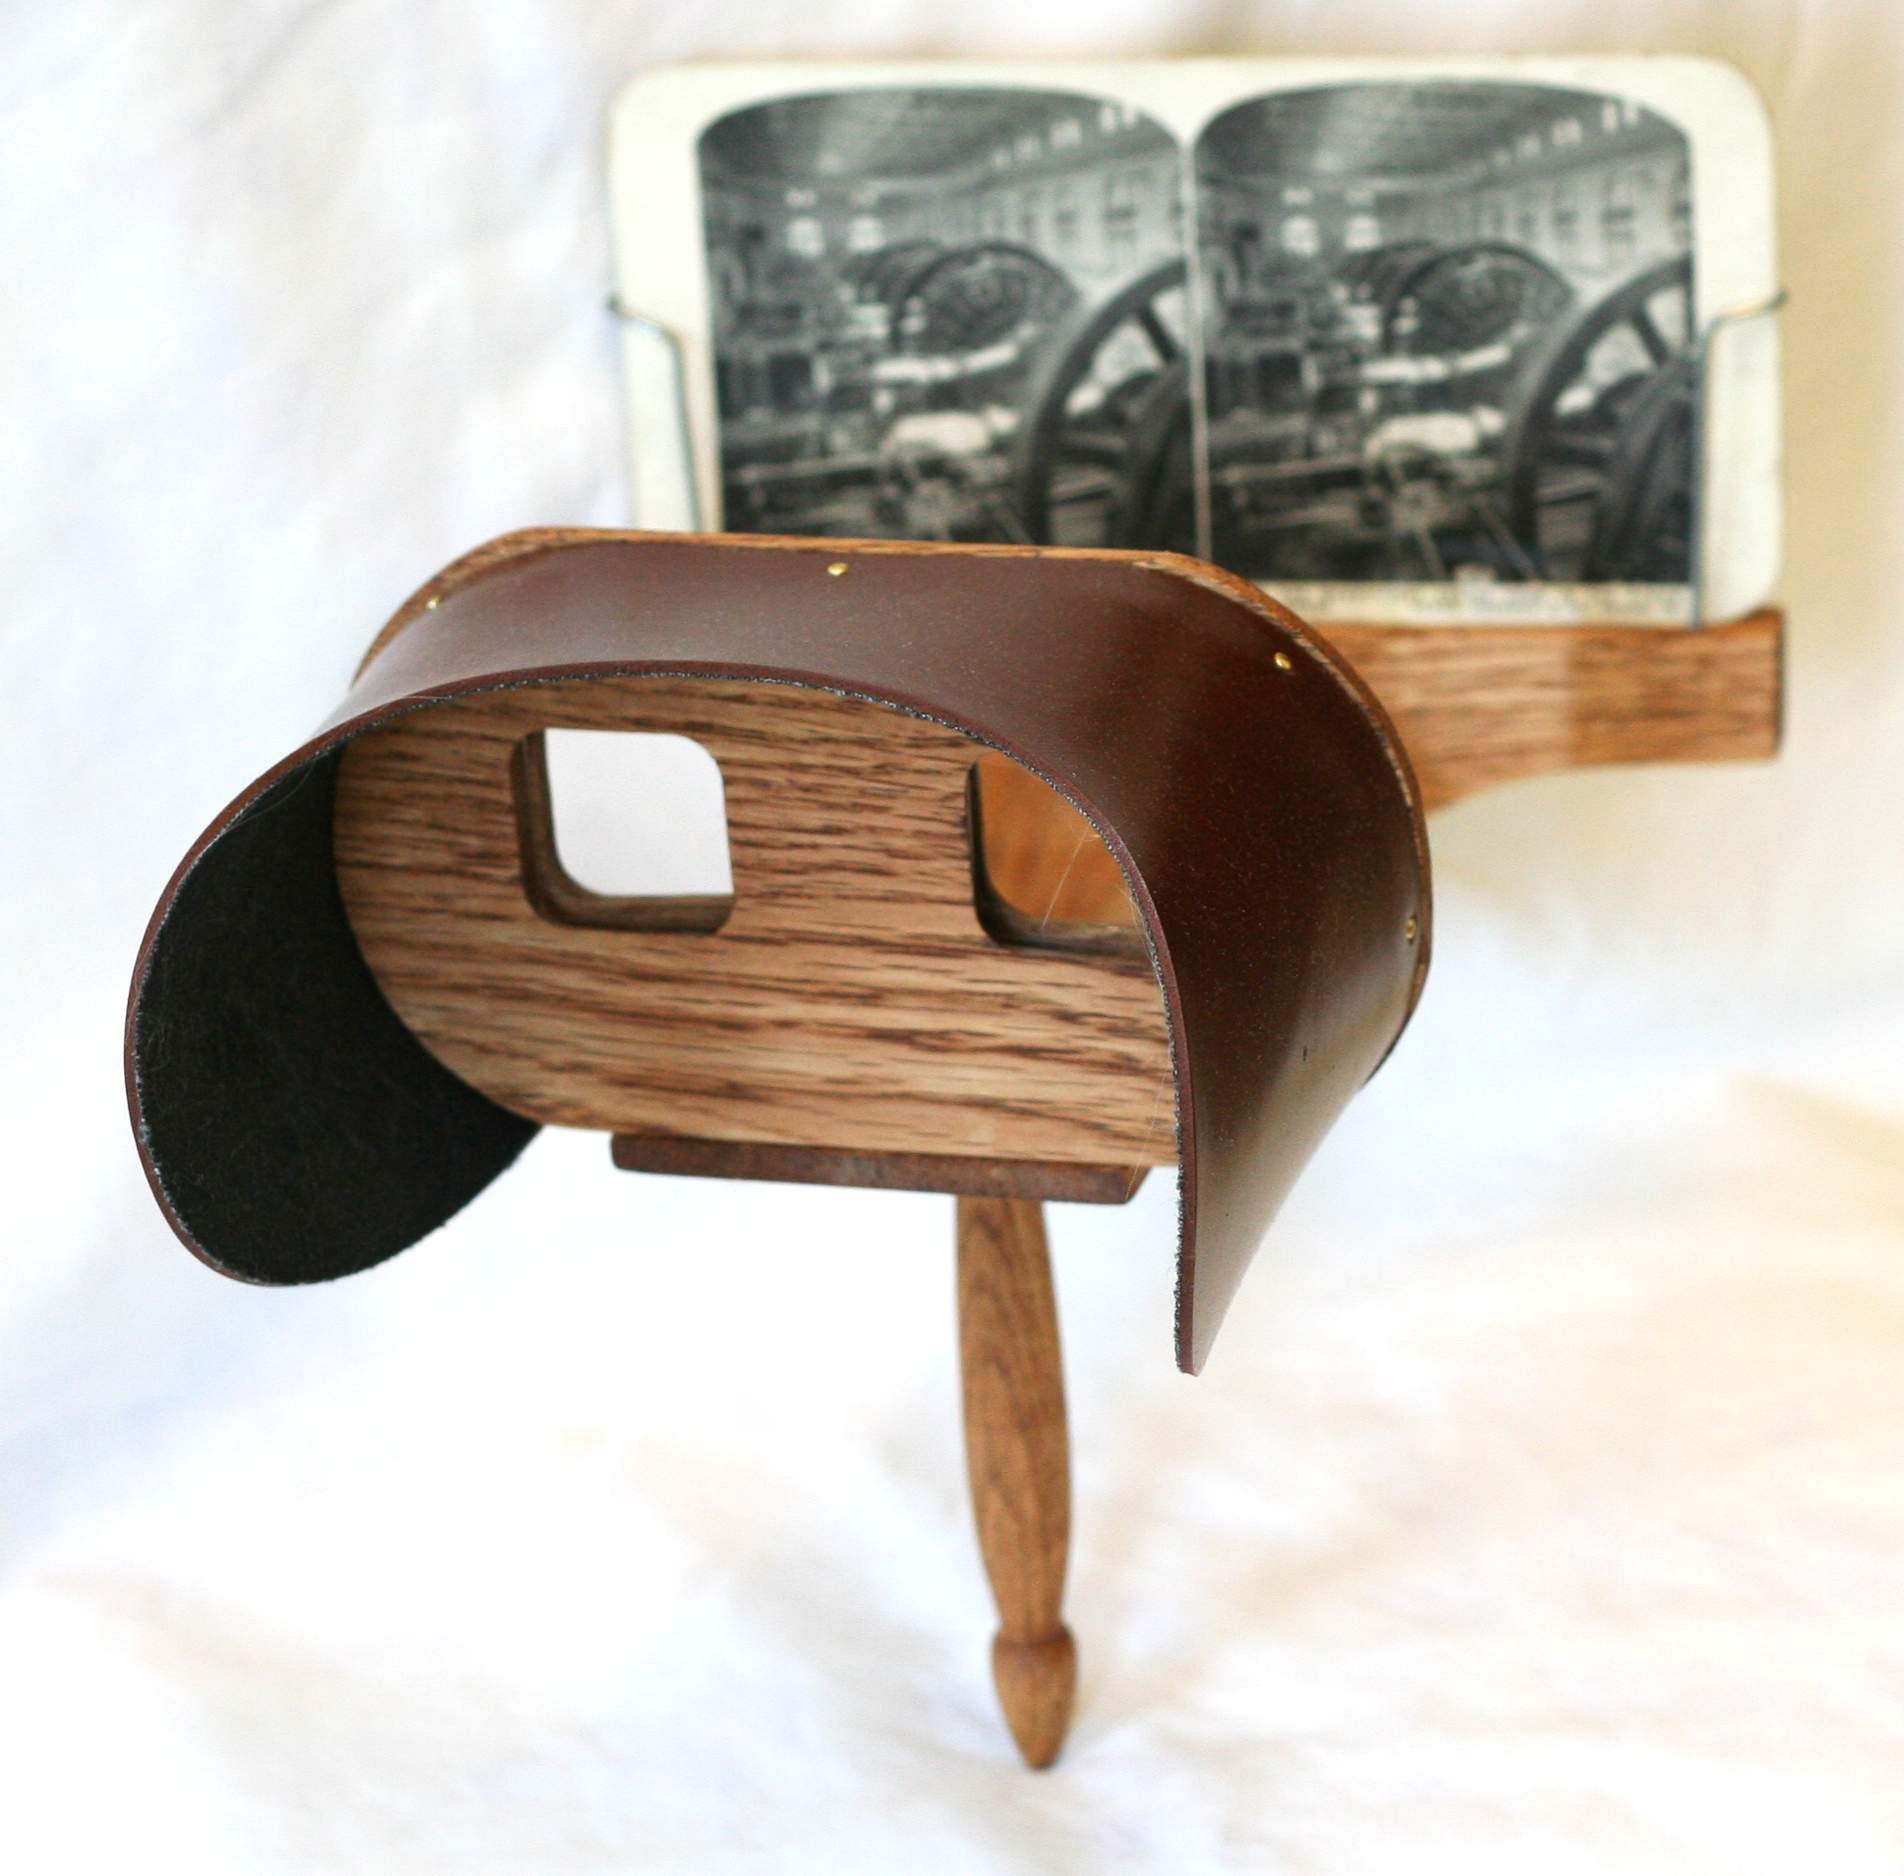
Image credit: Davepape, Public domain, via Wikimedia Commons
The only thing that might seem tricky about this is getting those two images in the first place. This is not especially difficult though - you can easily do it yourself with your own camera. Just pick a point to look at in the scene you want to photograph and take a picture of it with your left eye, then another with your right eye. As long as you keep your head fairly still, you’ll end up with two pictures with the right binocular disparity for stereoscopic viewing later.
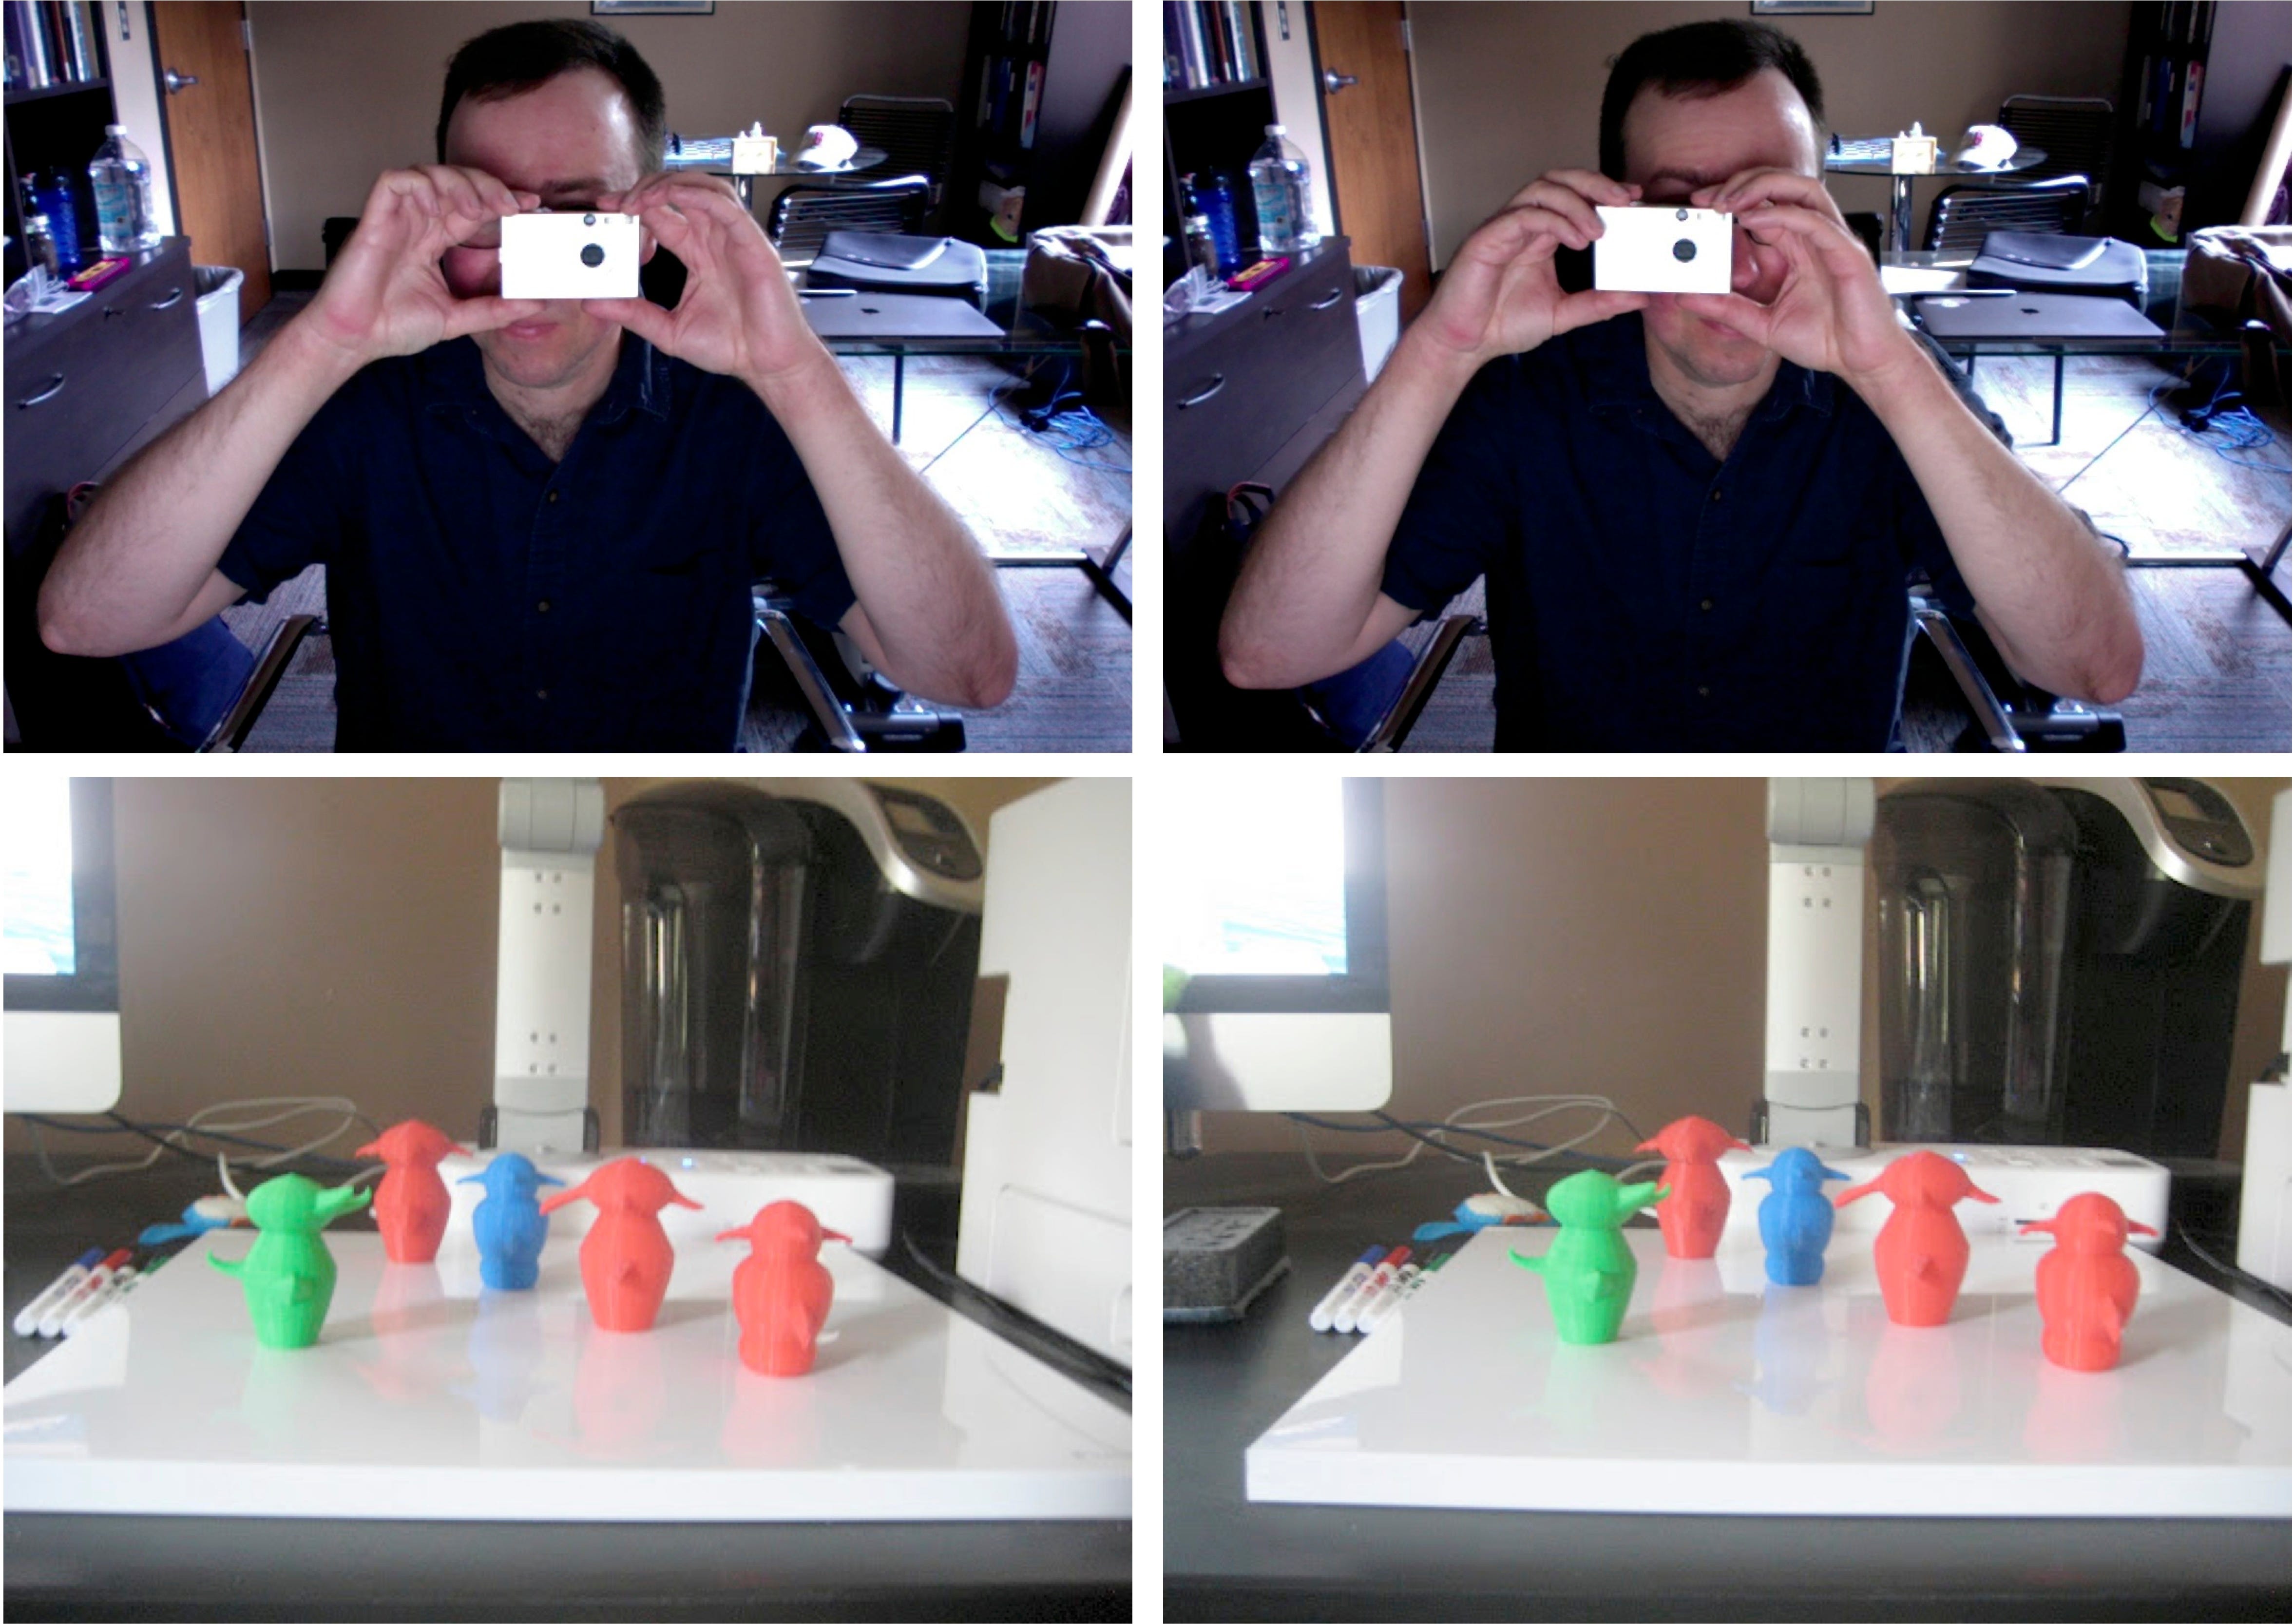
Image by the author, from Chapter 7 of my textbook PRACTICAL VISION SCIENCE.
Old-school red/green or red/cyan 3D images are using exactly the same trick as well! The only difference is that the two pictures your eyes need to see are superimposed on top of one another in different colors that are matched to the filters in your viewing glasses. This ensures that each eye only gets to see one of the two pictures so your visual system can do its usual work with binocular disparity.
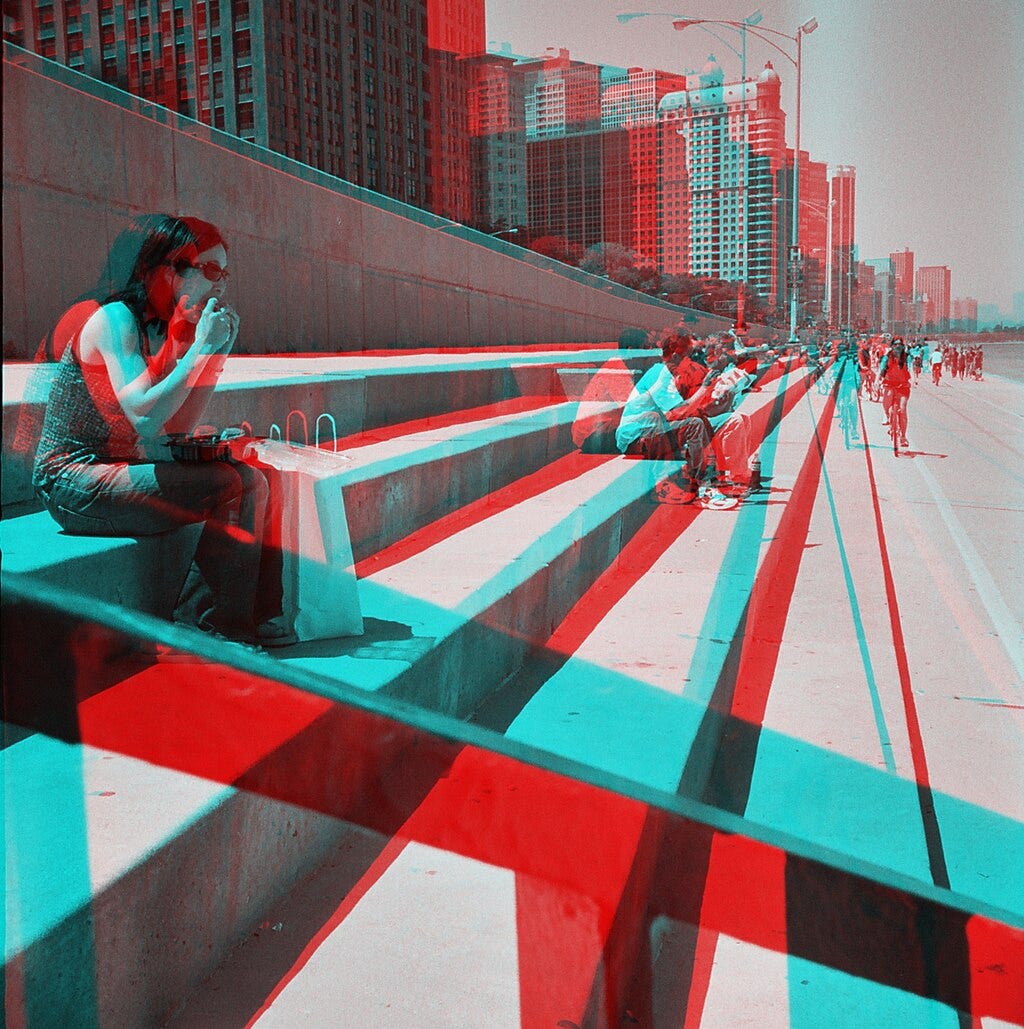
Image Credit: Kim Scarborough from Chicago, IL, CC BY-SA 2.0 <https://creativecommons.org/licenses/by-sa/2.0>, via Wikimedia Commons
So what’s going on with Magic Eye images?
Believe it or not, even though these other kinds of 3D images tend to be easy to see and Magic Eye images can be quite tough, it’s still the same trick. In a way, the Magic Eye (also known as an autostereogram) is a lot like a red/blue anaglyph but without the viewing glasses that help link the images you need to see to the correct eyeballs.
To understand how a Magic Eye works, I’ll start with the first thing you need to make one. Instead of taking two pictures of the same scene like I described above, we’re going to start with something called a depth map. Instead of a typical picture with different colors in different places and light and dark spots through the scene, a depth map is a picture that tells us just one thing about what we’re looking at: How far away is each part of this scene from me? Really that means that a depth map isn’t so much a picture as it is a table or spreadsheet. In the picture below, brighter parts of the image mean that that part of the object is quite close to you, while the darker parts are further away.
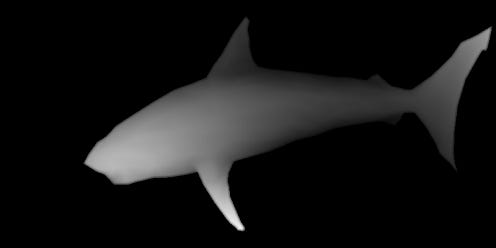
A depth map for the autostereogram available on the Wikipedia page about these images.
The neat thing about a depth map is this: Because we know that binocular disparity depends on depth (remember our 3 rules up above!), knowing how far away every pixel in a picture is also tells us where that part of the object should show up in the left and right eye! This turns out to mean that we can make a picture of the depth in a scene by “painting” with binocular disparity.
Here’s how it works. We’ll start with an image that’s the same size as our depth map with random pixels (or whatever pattern we like) already there. By itself, this obviously bears no resemblance to our object but that’s alright - we’re going to put disparities into this pattern so our object’s depth will be there. Every pixel in our depth map tells us how near or far that pixel needs to be from the viewer, which means it also tells us how far apart shifted copies of that pixel need to be! If that sounds confusing, think about the red/cyan image up above. You can find matching parts of the object in the red image and the blue image and you know they match because they look the same. Instead of putting a red image and a blue image on top of one another, what we do to make a Magic Eye image is (1) work out where the red image and the blue image would be and (2) make sure that matched parts of the object have matching pixels.
The end result is a pattern that looks random, but secretly has pairs of pixels shifted by different amounts according to where they’d be if we’d stacked a right-eye image and a left-eye image of the same object on top of one another. All we have to do now is get your left eye and your right eye to each see what they need to see and your visual system will do the rest just like it does with other kinds of 3D pictures.
OK…let’s cheat. So long depth from disparity, hello depth from motion!
Of course this is where things break down for lots of people. The thing that tends to happen is this: You hold up the picture to look at it and your eyes will tend to move a little inward to fixate the page you’re holding fairly close to yourself. The trouble is, to get those shifted pixel copies to the appropriate places in your left and right eyes, most Magic Eye images are designed so that your eyes need to less inward-turned than that. This is where all the advice about “relaxing” your eyes and “looking through the page” comes from - you’re trying to get your eyes to drift a little bit outward from where they are.
This takes practice and it does help a bit to know what you’re trying to do. It can also help to wrap a Magic Eye image in Saran Wrap or other cling film so that you can see your own reflection in it. Looking at your reflection rather than the pattern tends to put your eyes in the right spot! I learned this from a Magic Eye poster I was given as a gift in high school that was sealed up in plastic - it was the first one I ever got to work and it’s in my office (still sealed) to this day.
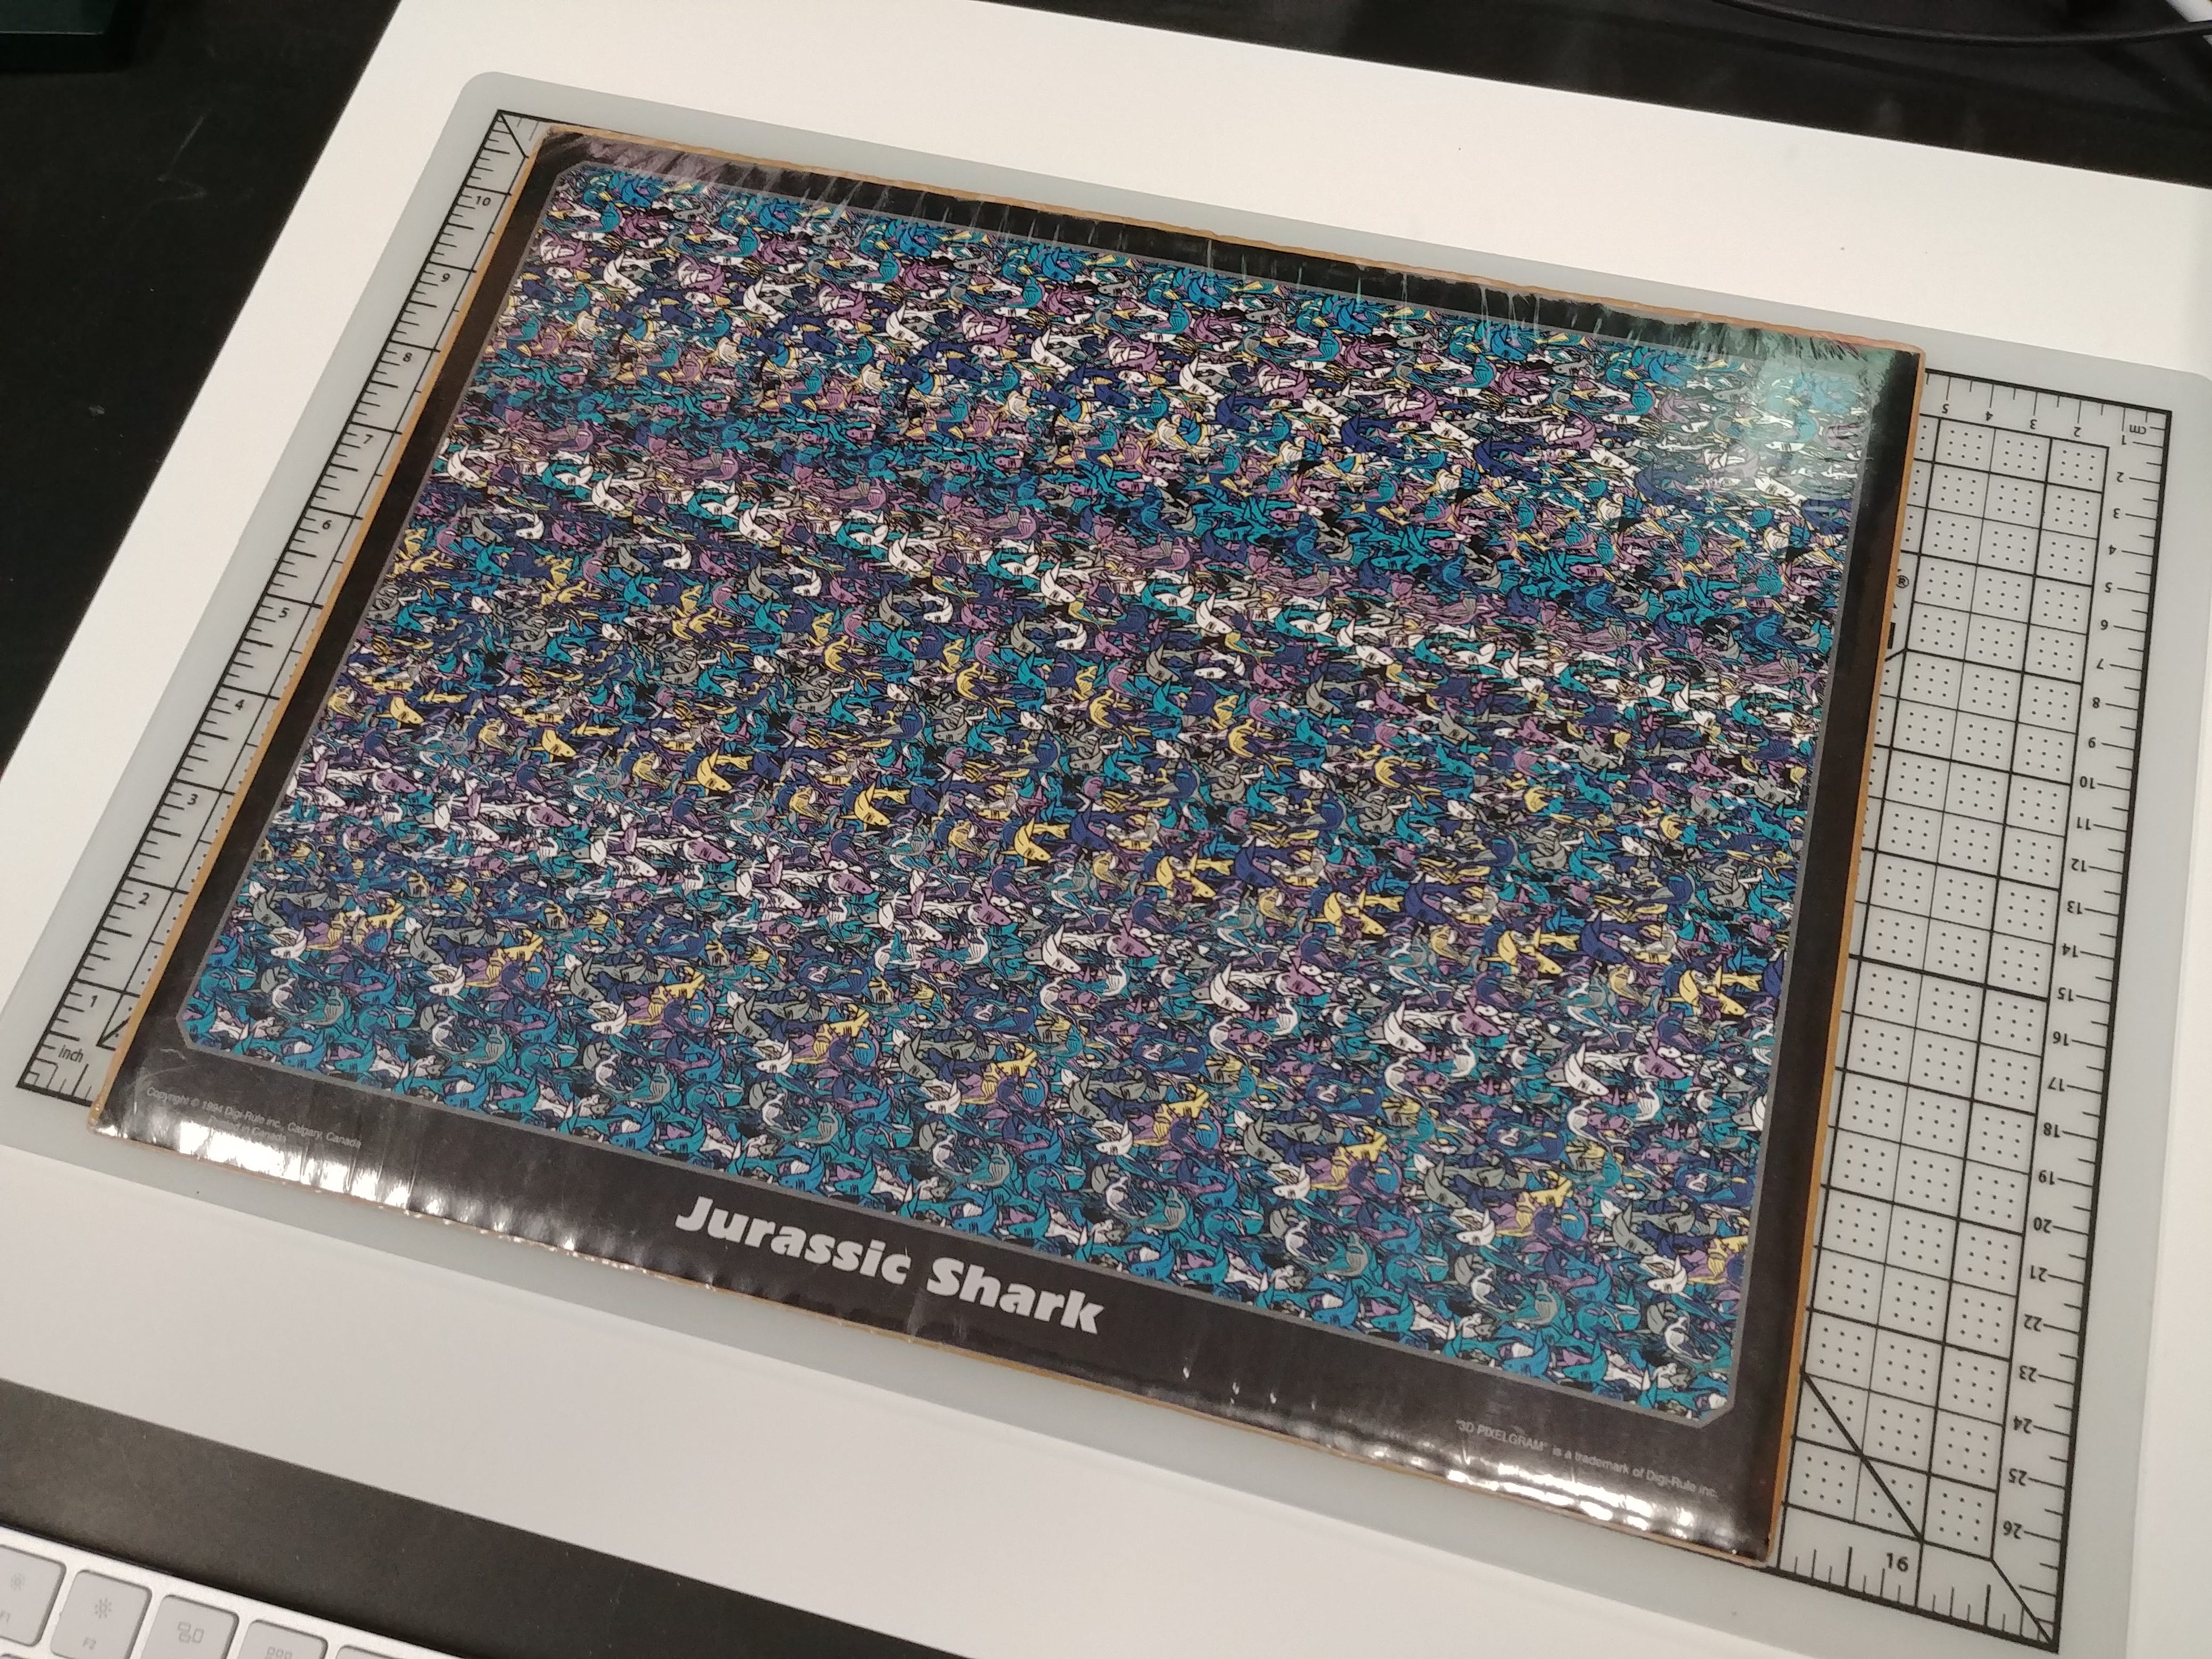
Image by the author. A bit of plastic film on a Magic Eye image helps you align your eyes the right way if you look at your reflection in the plastic.
If you don’t want to practice this, though, you can always rely on my trick - but why does it work? I hope it seems a little less mysterious now that you know what’s in Magic Eye images. By sliding one transparent copy of the image over the other, I’m trying to undo most of the pixel-shifting that was done to create the image. Next, by putting the two images on separate slides and alternating between them, I’m giving your visual system a chance to match those pixels across time instead of across space.
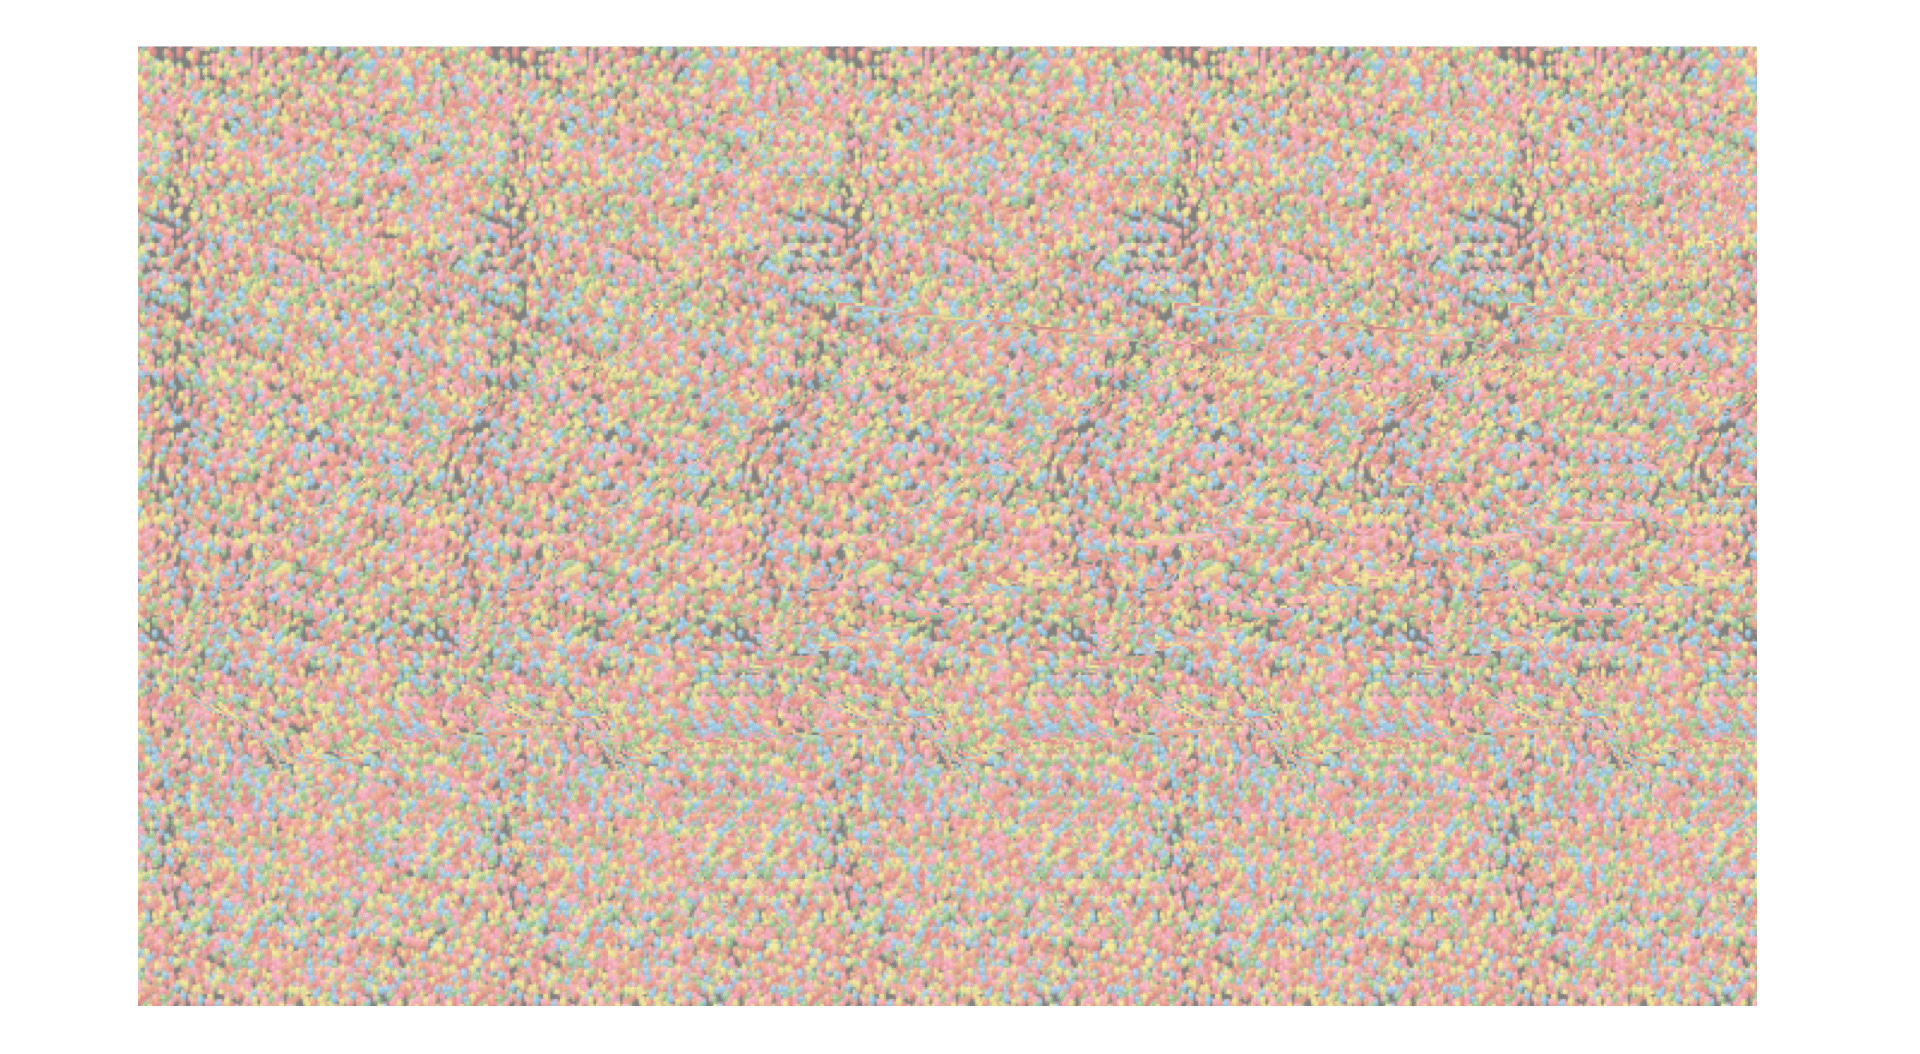
An animated GIF of the hidden shark embedded in an autostereogram on Wikipedia’s page about the phenomenon - this corresponds to the depth map above.
Seeing where the same thing appears at different moments instead of in different eyes is also a good way to estimate depth, it turns out. But you knew that already, so long as you’ve looked out the window of a moving car or train: If you’re looking way off into the distance, stuff that’s closer to you moves very fast, while further-off things don’t change position much at all. That relationship is a special case of depth from motion parallax and my PowerPoint hack lets you rely on this recipe for estimating depth instead of the somewhat delicate viewing conditions we need to hope for in the original Magic Eye.
Conclusion
If you were never one of Those Who Could See It, I hope this maybe gives you a little bit of closure and the chance to go see what’s hiding in these very cool images. Even if you already could get these to work for you, I hope it’s still neat to know a little more about how they work.
If you like learning more about why you see things the way you do, make sure to subscribe to my YouTube channel (http://www.youtube.com/@SeeingScience) for more science content focused on visual perception!
If you’re so inclined, you can also send a small donation my way ($1-$5), by visiting my Ko-fi page here: https://ko-fi.com/bjbalas - Never expected, but always appreciated!